Zeiss ZF.2 lenses with the DuClos Cine-Mod on the F3

Well we had the chance to spend some quality time a Duclos Lenses last week and try out the new Zeiss ZF.2 lenses with our F3. These lenses all had the Dulcos Cine-Mod: aperture de-clicked, solid focus gear added and an 80mm front ring put on. These were fantastic.

Matthew Duclos took us through the 5 lens kit they are now offering – what a cool deal. They also have these available for rental as kits configured with 5 or 9 lenses. The typical group consists of a 21mm, 28mm, 35mm, 50mm (macro) and an 85mm. You can also get an 18mm, 25mm or the 100mm (macro).

Zeiss makes a great lens and the Cine-Mod just adds to the experience. A very robust a solid feel with the added features of the focus ring and the common 80mm front. The rotation of the barrel is 270 degrees to 360 degrees in some cases – very nice. To that, very little breathing.

The images from these lenses are very sharp and clear. I did not see any contrast ratios that were out of range or false sharpness. CRI seemed right in there with our Sony PL primes. We did a comparison between the 50mm PL prime and the 50mm ƒ2.0 Zeiss and focal length was identical (within an inch at 10 feet side to side) and the Zeiss was a little faster. (I’ll post some frame grabs soon)

Over all I think these lenses are a great addition to any camera package and deserve a closer look.

Until next time, good shooting

TDTrey.com

Adobe Premiere Pro CS 5.5 for the Mac

Well it’s a whole new world… FCP is, well, X’d… Like many others I’ve been clinging to my FCP 7 but with the announcement of Apple shutting down any future support or development for Color and many of the short comings of FCP X I am looking to other NLE possabilities.

After looking into many options I decided I wanted to find a “bundled” package similar to Final Cut Studio – Enter Adobe’s Production Premium Bundle: Premiere Pro, After Effects, Photoshop, Illustrator and the list goes on and on. I had been waffling because I didn’t want to spend the $1500 full street price and just then Adobe dropped the crossover price to $850 – Yeah!!! So I downloaded the 30 day free trial. (If you do this, make the time to give it a real good try. I was put off the first afternoon because I didn’t give it enough time to set in to my way of thinking.) I can officially say that after 3 weeks of testing and learning I have made leap and bought the bundle.

The cool things for me are round tripping with After Effects, Photoshop and Audition. Also the importability with many different CODECs and formats. I just dropped a bunch of footage from my EX3 in after choosing the right sequence settings and there it was in realtime – pretty nice.

I’m using mine on an older MacPro (2006) tower 2.66 Quad Core with a Black Magic Design Intensity Pro video output card. I just upgraded the driver to 8.2.1 and it seems to work fine. I’m going to upgrade the CPU soon and add an NVIDIA FX4800 GPU card to activate the Mercury Engine features of the package. I hope to have more info on that soon. For the mean time I am putting it up against my FCP 7 package and working through the similarities and differences. So far so good.

Until next time, good shooting or editing

TDTrey.com

Porta-Jib Explorer

I have been following the Porta-Jib product lines for a few years now and am constantly impressed with each new creative tool they come up with. Most of my work revolves around talking head and product shoots. And usually are steeped in a long shot list with a short time frame. Creativity is generally the first casualty of the shooting day. With the Explorer system, I’m finding I can “buy back” some creativity / inspiration without much cost to the day.

I recently used the Explorer on a car review for Kelly Blue Book and was extremely pleased. The director said “Sure. Bring it along. But I don’t want to be slowed down or have to sacrifice shots while you are fiddling with adjustments.” I’m happy to report we finished 15 minutes early and had at least 5 extra shots in the can. He loved it!!! We never came off the system. We did both JIB shots and then worked the heck out of the TROLLEY / SLIDER config.

I’ve used the system with everything from a SONY Z7 to a SONY F3. (And that includes my 5Dmk2 and EX3). The Explorer system seems right at home in any environment. I see this system as a fantastically versatile opportunity to recapture some of the excitement and creativity we all enjoyed when we were first starting out.

Thanks Mark and Scott. Great Job!!!

Check out my video review – Trey’s Gear Review: Porta-Jib Explorer

Until next time, good shooting =)

TDTrey.com

IR filters for the Sony EX cameras

Defining the problem
If you have used the Sony EX1 or EX3 in a setting with black or gray fabrics you may have seen a magenta shift in the picture. One little catch with the new Exmore sensors is they have a big sensitivity toward the Infra Red (IR) spectrum. We did a bit of testing here and found a good workaround with some screw-on IR filters.

As you can see in the pictures the uncorrected shirts have pretty a good magenta shift. The set is lit with one Diva 400 at 3200k. We found in interview settings under either 3200k or 5600k the shift still happens. We talked to a few filter manufacturers and narrowed it down to Tiffen and Schneider. Both had nice offerings for IR filters. Tiffen has their series call Hot Mirrors and Schneider suggests the 77E IR cut (486). We found that the 77E (486) worked the best on both our EX1’s and then the EX3’s. So far we have not noticed a need for the IR filters on our Sony F3. Yay =) Originally the 486 was sold as the best filter for the RED and the Hot Mirrors were the best for the EX cameras but as we tested the opposite was true and that’s why we went with the 77E (486) for our cameras.

Care and Handeling
At first we were putting the filters on when we saw the problem and then removing them after the shoot as they are almost $300 each… After a while we realized the potential to damage the filter when adding or removing it was greater than just replacing our UV filters with the IR filters permanently.

Playing well with others
The filters seem to work well in conjunction with other filters and 4x4s in line. We have had no problems using the IR filters and screwing our Polarizers on in front of the IR.

Best of luck with your filters and lens kits.

Until next time, good shooting.

TDTrey.com

Sony PMW-F3 and Corporate Video or: how I took the primes and learned to love the zoom

At least our first outing with the F3 didn’t bomb… The following is a quick recap of our experiences with the F3 during a typical corporate interview project.

Quite a bit different from the gorgeous sunrise / sunset, stage footage that seems to be popping up all over the web showing off the fantastic capabilities of the new F3; a straight ahead corporate shoot has a unique set of challenges and potential pitfalls. Granted you are not hiking into the back areas of Yellow Stone or running a 30 person set with all the trimmings – but you are usually tied to certain time constraints and have some limited space and lighting control. All that being said I think we can read into this post with the right mind set =)

The F3 operates a lot like it’s EX brethren. Most of the same menu functions and settings apply. For instance, the audio knobs are in a different place and I had to remind myself to stop looking the the “Internal / External” mic switch. It’s back to old-school plug in the mics you want to use. We were running with one wireless for the day and decided to send the feed to both channels 1 & 2 and keep channel 2 at -6dB as a safety. Same as an EX1 or 3 to set up. I put the Sennheiser EW100 at 0dB AF output and ran the transmitter at -20dB sensitivity. At the end of the day I wish I would have run the transmitter at -30dB – our last interview had a booming voice at times and I got a little close on channel 1 to the red…

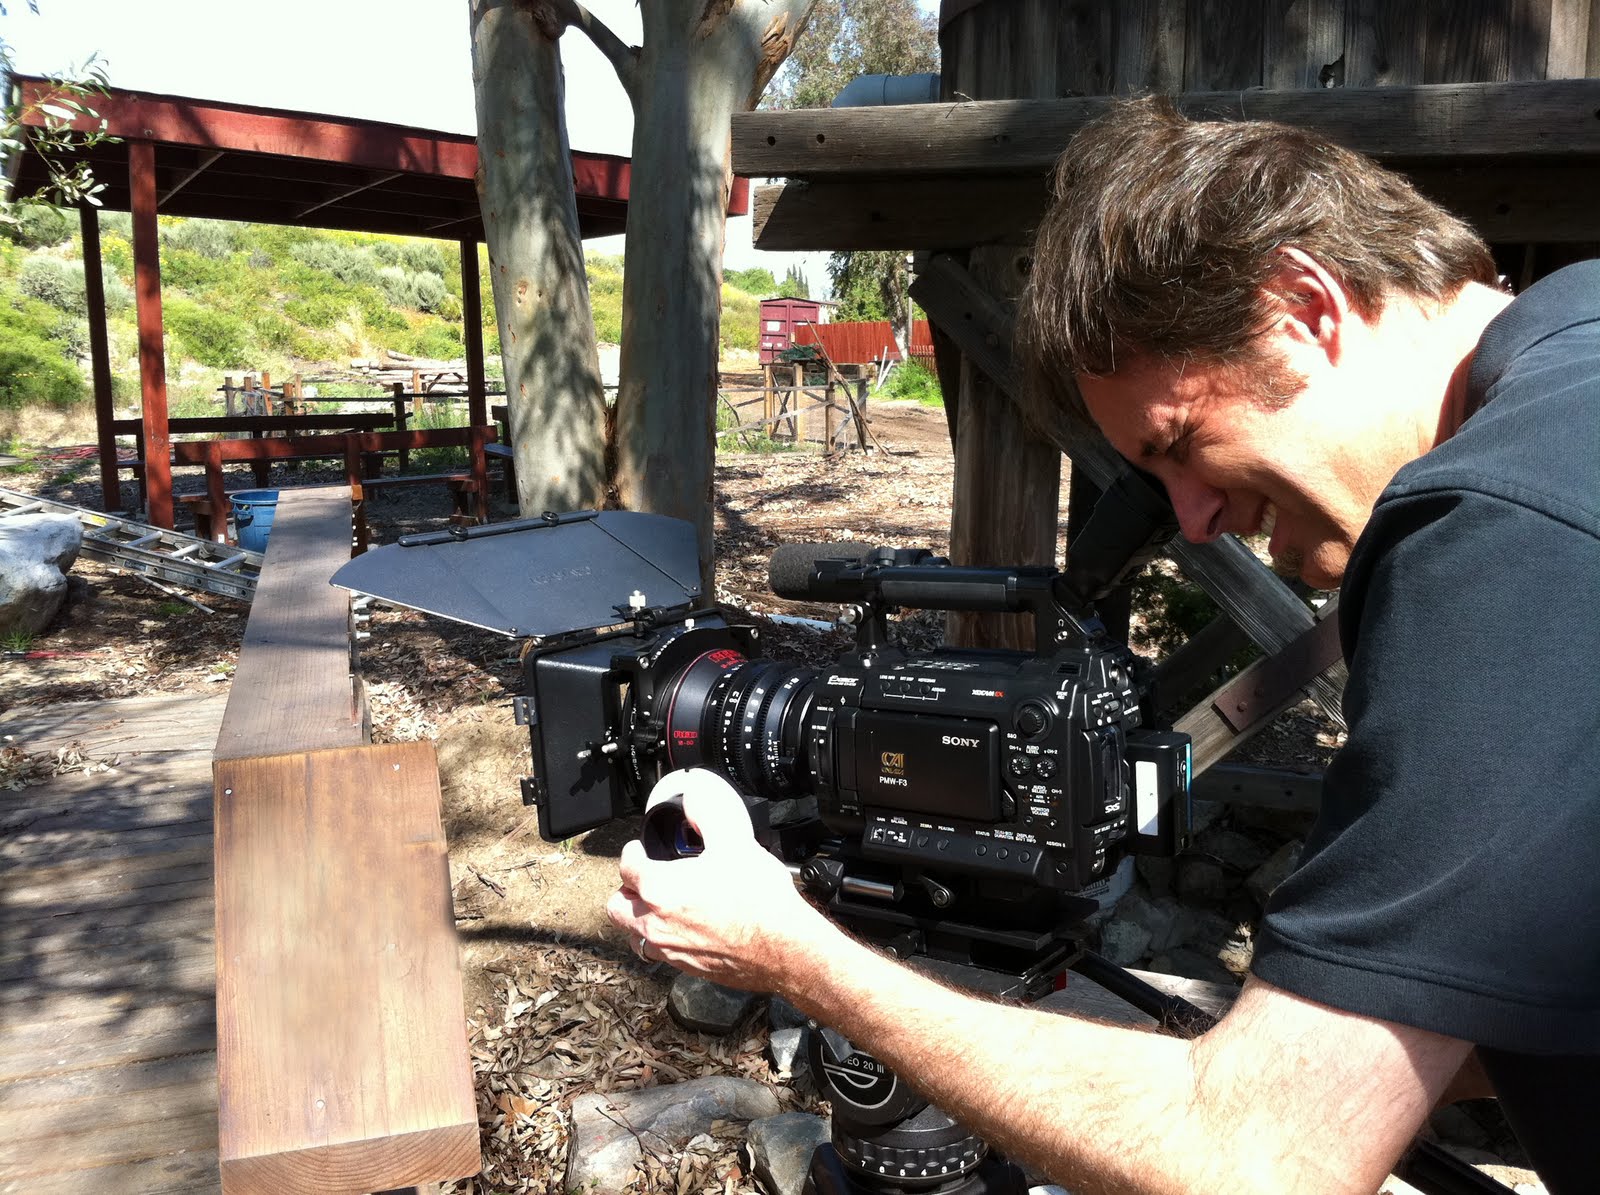
OK, a little more about this title (aside from the obvious Dr. Strangelove homage). We had our full set of Sony primes: 35mm, 50mm and 85mm with us but I wanted to run with the RED 18-50 all day. I felt the zoom would keep us moving fast and on schedule. The crop factor on the F3 is almost identical to the 7D (see my F3 Days-Day 2 post) so the 18-50 was more like a 28-80mm focal length. We decided to buy the RED as it does talk to the F3 through the cook contacts and is fairly reasonable in price — all things considered — for a PL zoom. It looks quite nice. Outdoors we use it at a ƒ2.8/4 split with both NDs kicked in. When we moved inside we ran WFO at ƒ2.8 and adjusted our key to match. Interestingly a little soft… I had to use the “Expand Focus” a lot to nail the eyes. I had the peaking set and was getting good readings but when you looked at the feed on my JVC 17″ HD monitor it “just looked soft”. In retrospect I think WFO is not the best choice for this (or any) lens… I should have run a little closer to 4 and played my 1/3 – 2/3 ratio a little more to shallow the DoF. We got a nice look though =)

Another thing we noticed, from a mechanical stand point, is our matte box from our EX3’s is just a bit small for the shade on the RED 18-50 to fit through… saw a little vignetting. We made the decision to just push through the vignetting at 20mm – it was real close – no biggy. I’m talking to the manufacturer about a backmount flange replacement to solve this. Just the kind of things you find as you are going through… The matte box opening is 100mm and the shade is 114… Oops – my bad.

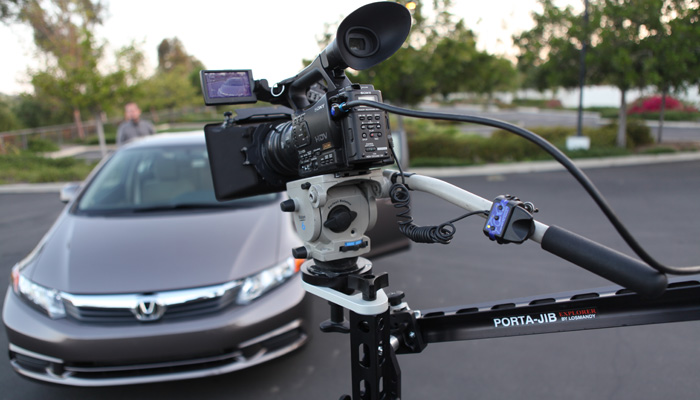
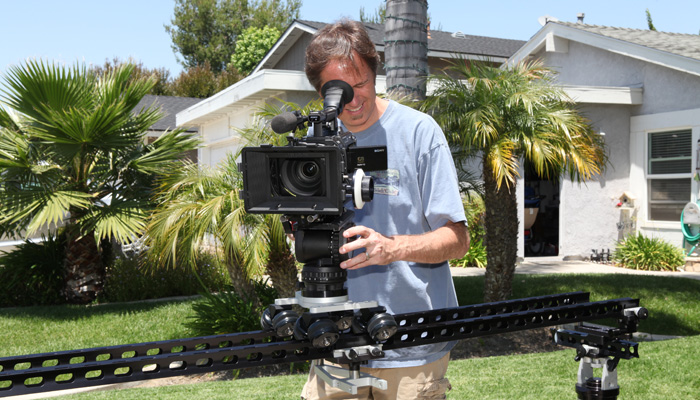
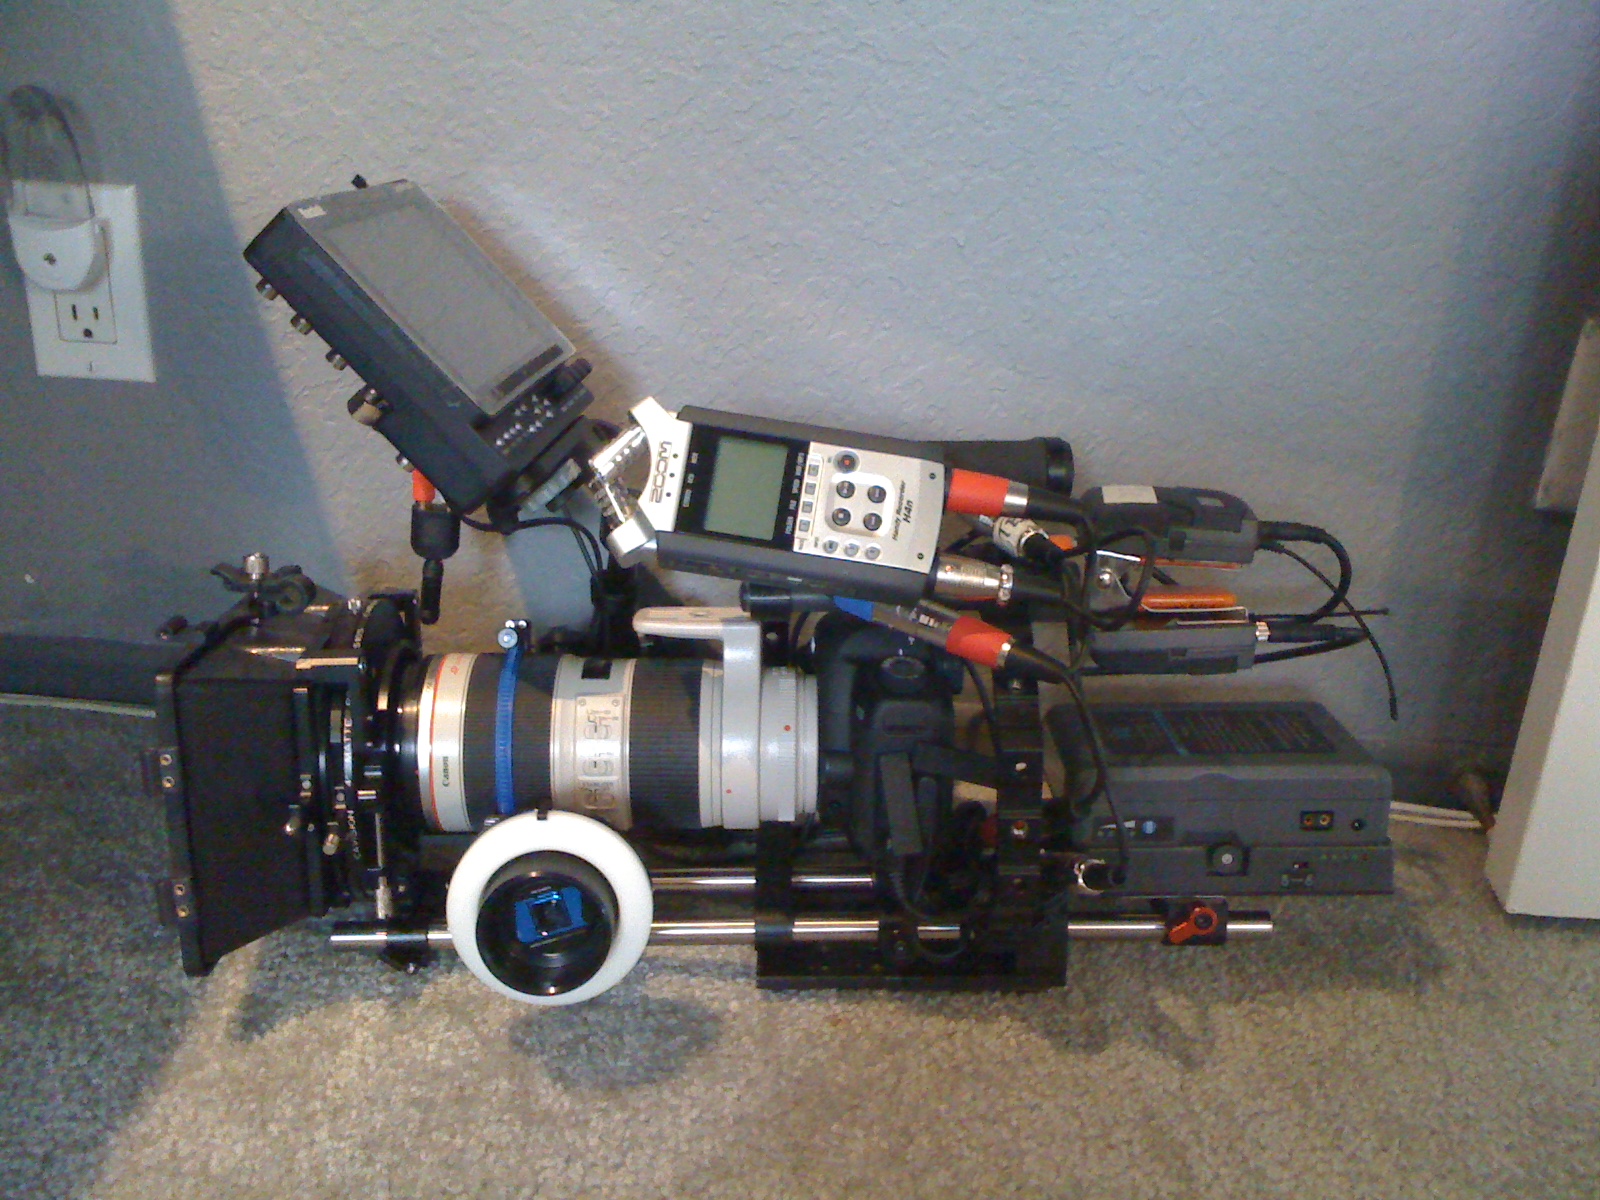
I set up the camera with the RedRock rails and support base. The sliding plate makes balancing a breeze. I have these plates and receivers on all my cameras and tripods. Sachtler plate $85 – Manfrotto 357 plate system $49, additional plates $27 — Duh =) This system works great with our matte box and RedRock v2 follow focus. We put an ARRI focus ring on the EX3’s. It’s nice all the PL lenses have the proper .8 focus rings/gears built in.

The HUD in the monitor is very informative just like the EX1 and 3. I use the dual zebras and peaking a lot. The histogram is handy depending on wardrobe. Audio levels metering is so nice after spending time this year working with my 5D+Zoom – I can see the levels through the picture and never have to look away at the Zoom. As I said, the RED lens talks to the camera so the aperture, zoom and focus distance displays all work – Cool.

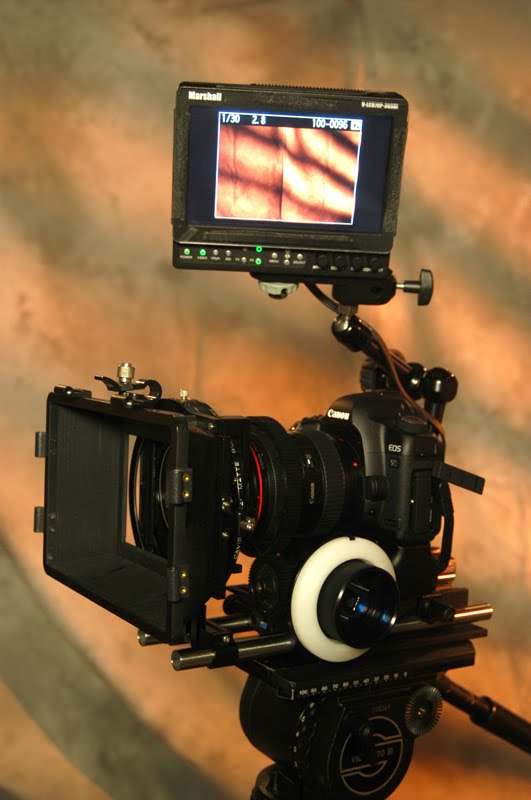
Coming into the home stretch… Using the F3 with the 17″ HD client monitor was great – both for composition and focus watch dogs… The hardest thing about transitioning from the EX1’s and 3’s and other ENG cameras to the shallow DoF rigs is the tendency to still just “wing it”. You can do that with an ENG rig in running and gunning mode but with a 5D or F3 or any of the shallow DoF cameras it’s a challenge. I often have to “retrain” the producers I am working with to not just say “grab the camera and lets go… Oh by the way, I need this shot to be really shallow and sexy” – while we run along side a person moving through a back-lit office setting… It’s back to basics: good blocking + good rehearsal = good focus.

Well, thanks for checking out another TD Blog. Looking forward to the next time,

TDTrey.com

5DmkII All Grown Up

So since my last entry for the 5D I have added a few new goodies to the rig… As you can see (kind of) I have the whole enchalada mounted in an cage (love it) which makes grabbing this camera and using it a dream. The cage is made by Easom and this particular version is called the Halo. It provides 2 ribs for connecting the upper and lower sections and I have them staggered here. Their other model called the Solo has only 1 rib – an equally nice cage. Also I found a great D-Tap power distribution company: Hawk-Woods in the UK. They sell a kit that allows you to use you V-mount batteries with DSLRs by way of voltage regulating the power with the adapter that goes into your camera where the battery fits. Now I power my camera, monitor and any other goodies from a single B4B V-mount battery. This is a mid sized battery 6Ah/90Wh and lasts about 2 to 3 hours each.

To go with the “all growed up” look I added my RedRock follow focus and CA Vision matte box. I had to go up to 18″ rods to make everything fit and balance out but it all sits there nicely now. I put a small Pony clamp on the back of the cage handle and slid both of my Sennheiser wireless receivers on there for a tight cable package. I used XLR splitters to feed the mic’s outputs to both the ZOOM and the 5D at moc level. There is an XLR to stereo mini adapter cable in there going into the 5D itself.

Rounding out the system I have a Zoom H4n mounted to another part of the cage and my Marshall monitor is being held on my a Manfrotto mid sized articulating arm. It all fits… and comes in at about 16.2 Lbs…. ouch =) I have another Noga arm on order that should drop a pound or two off the total weight of the package. I’ll keep you posted.

TDTrey.com

ZOOM H4n Digital Recorder

Recently got to use the new ZOOM H4n on a project to track GOPRO cameras in a car interior setting – Worked great. We first used them with the internal mics place near the interviewee – that worked OK but had a little too much road noise. Plan B, we already had the people miked from the other part of the interview process with Lectrsonic 195 systems so we just added the ZOOMs to our field mixer bags and set those in the back seat during the “on-the-road” interviews and used hand claps to sync them up later. Sounded great.

Things we learned:

  • 4gig – class 4 cards were fine
  • 48/16 WAV files fit right into the edit
  • Batteries would last almost all day – 10 hours
  • New front panel design was much easier to read and operate
  • Mic level in to the XLRs from the mixers worked great*
  • Gain staging mixer to H4n had plenty of wiggle and head room
  • Make sure you don’t bump the MIC/1&2 buttons – Silence… OOPs
*In preparation I had done a lot of reading up on the new H4n and most said “no line in”. I understand the combo inputs are designed to accommodate HIGH impedance signals from guitars and basses 10k. Well I did some testing after the shoot, -10 line out of my FP33 @ 0vu yielded a nice signal when the record levels on the ZOOM are set relatively low. No sonic coloration that I could hear – Tone and Dialog.

I have the H2 and the H4n. The H2 stays with my FP33 as a piggy back dual system recorder and the H4n stays with the 5Dm2. Nice kit to have…

TDTrey.com

My 5D Mark II has arrived !!!

OK OK… So I held off as long as I could. The first time I saw the photos of the all rigged out 5DmkII I thought WOW!!! Then I told myself I was just judging a book by it’s cover. It looks very cool — but it’s not ready for video yet.

So I waited, patiently, with my EX1 and EX3 by my side. My trusty LETUS 35 Extreme always ready… Then it started happened. People I knew started asking for or using the 5D and 7D on their projects. TV shows started using them. Canon released the firmware updated for the 5D — now it was a whole different ballgame. Workable frame rates, better control over the sound (even if it’s just a scratch track in most cases) and Zeiss has adopted the EOS platform as a real entity. All hail the CP.2 lens set…where’s that winning lottery ticket….

I’m now into my third week of owning a 5DMKII. It took a week to figure out how to get it into video mode. My first subject – my big toe… Got almost a minute and a half out of that. Next it was on to real uses. I re-configured my RedRock rod system and V2 follow focus from the EX3 to work with the Canon 24 -70 2.8 L lens that I bought. Worked out the mount for my 7″ Marshall monitor and tracked down the elusive spare Canon LP-E6 batteries. I was able to make my CA Vision matte box just fit the tall form factor of the 5D with the battery grip on it.

I’m off to the races — or in this case an art showing for a friend to shoot a couple of interviews for the event. They turn out really pretty good considering the room was packed and I used only the light from a hanging PAR 64 blasting the art on the walls. I put the interviewees about 4 feet in front on the art and me about 3 feet in front of them. Not your ideal ratio – but it’s what the room could handle. The DoF was not bad when I looked at the footage later. Important safety tip Egone… Just because you can go WFO with these lenses on the 5D and get everything really shallow – doesn’t mean you should. The first interview went great because the interviewee stood still — at ƒ2.8. The second person repeatedly leaned in to make her points. I didn’t think it was that far… but she fell in and out of focus slightly through out the interview. To do it over, I would set my focal plane more forward or shoot an ƒ4.0. Still a good first outing.

I’ll keep you all posted. Should be a fun learning curve. Have a great weekend.

TDTrey.com

To DIVA or not to DIVA… That was the question.

I have been working with tungsten based lighting forever and just recently got into KinoFlos and LED technology. Wow what a difference. Each technology has it strong points. I still love the way my open face pars wrap around people and objects — but the flexibility of the Divas to conform to any situation is really great. The instant color change out and the dimming capability is perfect for almost everything.

As more and more LED instruments are available we are certainly working in a great time for lighting. But, I believe you will still need some good fire power to keep up with daylight spilling into (or onto) your set if there’s no way to control it. The LEDs continue working there way up to the power of the Divas and the brute force of a Mighty Mole (at a reasonable price point) but will need a little more time to get there. Please send in a comment or suggestion if you know of some reasonably prices LED solutions out there in the 1K & 2K power range…

The bottom line is to use the instruments that work for you — but also to be open to new technology when it comes to lighting. I recently bought two DIVA 400s from a friend and love using them. They compliment my tungsten kits perfectly. I’m a little late to the game for this config, but keying with 56K and using 32K for kickers and background is an awesome combination. Plays really nice in mixed light situations. And, you get full “poop” out of all your instruments. Very cool…

‘Til next time,

TDTrey.com